I just finished building my first Master Grade Gundam. I can honestly say it won’t be my last.
Recently I’ve been looking at a few new creative outlets and plastic model kits have caught my eye. What drew my attention originally were some of the Transformers model kits from Flame Toys. It had been years since I had assembled a Gundam. The first (and only) kits were a couple of smaller Gundam Wing kits — the Deathscythe Hell and the Sandrock. They were neat little kits but I can’t recall much about them having purchased them almost 20 years ago. After a couple of moves and some shuffling of my various collections, they’ve long since been lost. But the Transformers kits reminded me a lot of those early Gundams only now they were representations of iconic characters I grew up with.
Fast forward to last year and to the Flame Toys Transformers 01 Optimus Prime model kit. I’m a big Transformers fan and found that the Flame Toys Transformers model kits looked pretty interesting so I decided to pick one. The kit proved to be a lot of fun. It went together fairly easily and looked pretty good. There were a few issues — some stickers that were generally going to be impossible to apply without creases and some looseness in some of the joints — but overall I really liked it. It was enough to get the ball rolling and I decided to set aside the Bumblebee kit from the same company.

I have to state upfront that at the time, this kit looked pretty good but I’ve since found a few issues with it. The construction wasn’t hard and it looks great but the final build really does suffer from loose joints. One of the inner leg panels fell off when I took him off of the shelf. When I tried to re-insert it, the leg fell off. It’s just very loose and glue is recommended. The results are fine, but you won’t find yourself playing with it much. It just feels like something is going to fall off every time you pick it up.
Before I picked up the Flame Toys Bumblebee, however, I picked up the Gunpla Starter Set Vol 2 which included a 1/144 scale High Grade Universal Century (HG Ver.G30th) Gundam and a gray panel liner pen. I thought I would try my hand at assembling an actual Bandai Gundam again since I had heard so much discussion about them and Heroes’ Beacon was selling out of them on a regular basis.

I decided to take on the Starter Set first and quite frankly I recommend the kit to anyone looking into Gunpla or any plastic model kits. The little kit was a lot of fun and resulted in a great looking, classic Gundam once assembled. High Grade (HG) kits like this one are generally the more basic “grade” of Gundam kits. They are genearally less expensive with some kits under the $20 mark. Some of the more recent High Grade kits though can get quite detailed. It also doesn’t help that the Starter Set includes the original grand-daddy Gundam who himself is not nearly as flashy as his more contemporary counterparts. This kit included a model from 2011 but holds up pretty well. The finished product looked great, came with a large number of accessories and it holds together really well with nice, tight joints. The few stickers that were included (mostly for the eyes and a color correcting sticker for the neck) were easy to put on. I also decided to try the panel liner which gave the details and recesses a bit more visual “pop”. While he’s not as fancy as later kits I’m going to talk about, he holds up very well to the Transformers kits. He’s smaller but with just as many joints and he holds together much better than Optimus Prime did.

In the end, I was really happy with it and decided to quickly move on to my next kit — Bumbleebee.
This is where things went sideways a bit.
The Flame Toys kits are good. They are decent. They are functional. The results look pretty sharp and Optimus Prime — while having a couple of quirks — was a nice kit. Bumblebee, however, just doesn’t hold up. There were some odd color differences between the yellow of Bumblebee and the yellow of his jet pack — which looks almost faded. Some of the joints were frustrating to the point of having to jump around a few steps in order to try to get the joints connected first and then assembling everything else around them. In short, it was a very frustrating kit. The results were decent but it wasn’t nearly as engaging as the little Gundam I had put together earlier. There were some seams around the tires where it just didn’t hold together as snugly as it should and overall the figure just feels a bit plain.

Not shown — the jet pack. I didn’t like the faded yellow and frankly I had gotten so frustrated by the kit that I decided to move on.
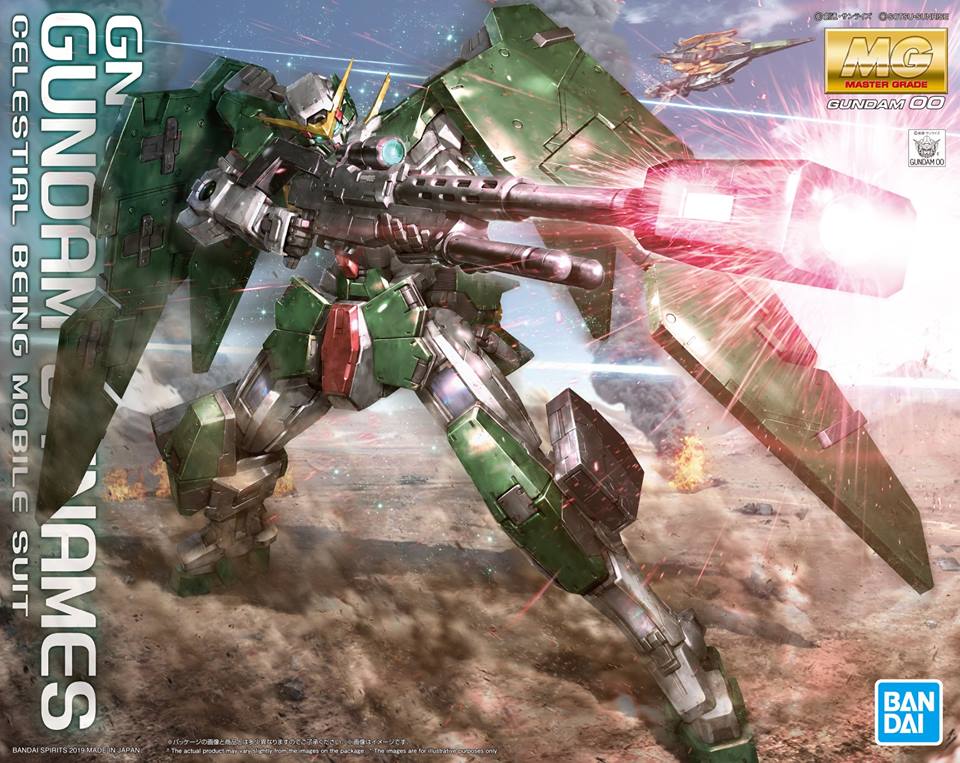
Before finishing Bumblebee, I had also picked up a Real Grade Gundam kit — the Gundam 00 Qan[t] Celestial Being Mobile Suit GNT-0000 — having enjoyed the first one so much and because it looked amazing. I mean, look at that box art!

Real Grade kits are 1/144 scale kits — the same size as the High Grade kits — but with significantly more detail. I’m glad I picked it up. Bumblebee had soured me on model kits and had I not picked up the Gundam Starter Kit, I may never have made another attempt. The frustration had me walking away from the Bumblebee kit for a few days at a time between steps before I finally finished it and even then I didn’t bother with the stickers or jet pack. The Qan[t] was smaller in size but even more complex with tinier parts and practically microscopic stickers to apply. Yet, in the end, the Qan[t] was a marvel. Every step filled me with wonder as I assembled tiny joints and limbs and watched them bend and fold in intricate ways. I spent several minutes with the inner frame alone just trying to figure out how they achieved so much detail on such small parts.

The Qan[t] wasn’t entirely easy to assemble. There were minuscule parts to trim out and assemble and dozens of detailed decals to put on the figure (entirely optional, but I added them). The inner frame — whose limbs come pre-assembled — was fascinating in terms of how intricate a plastic model kit could be.


The end result was a figure that was beautiful to look at, extremely detailed and a ton of fun to assemble. While a bit more delicate than the earlier Gundam I had assembled or even Bumblebee, he’s incredibly poseable and stands very easily. What’s even more striking is that I recall paying more for the Transformers kits. They are larger than the Qan[t] but not nearly as complex or as detailed and certainly not of the same overall quality. I know it’s likely licensing but I felt I got more value out of the Bandai Gundam kits. While Bumblebee — a much less complicated figure — frustrated me and soured me on the process, the Qan[t] left me wanting more.

And I decided to go bigger.
I decided I’d try assembling a Master Grade.
The Master Grade Gundam kits are 1/100 scale kits — larger than both the High Grade and Real Grade kits (which are both 1/144 scale) and have a lot more detail and moving parts. While having more parts than the Qan[t], most of that is due to the added complexity the size allows and by no way did the Master Grade kit I had feel more challenging or complex overall.
I decided that my first attempt at a Master Grade kit would be the MG 1/100 Gundam Dynames Celestial Beign Mobile Suite GN-002 from the Gundam 00 series. It was at the time the only Master Grade Heroes’ Beacon had in stock and the model itself was very well reviewed online — and it looked awesome. I also picked up a new set of nippers to replace my larger ones. I also had some glue (which ended up never being used), a pack of various fine grade sand paper, a small jeweler’s flat head screwdriver (which I had been using to lift and apply stickers in place of tweezers) and panel liner pens. A good pair of nippers would be the bare minimum that anyone would need but there’s plenty of useful tools to have when assembling these.

The MG 1/100 Gundam Dynames comes in a fairly good sized box which holds a manual (with black and white instructions and color photos), eighteen plastic trees of parts, a small sheet of holographic rubbery plastic parts and two sticker sheets — one of which has the foil stickers for eyes and other reflective details. Unlike the Real Grade Gundam Qan[t], the instruction manual has information in both Japanese and English. This is generally not required as the instructions are very well detailed but does give you a little more information. There are also color photos and information about the Dynames itself, its pilot and its various weapon systems from the show.


One of the first things to assemble on the kit was the GN Drive unit. This little engine is both a distinctive component of all of the Gundams from the Gundam 00 anime and of the model kits for that series. The drive assembly can also house two LED kits (sold seperatly) to light up the chest and engine of the figure and is designed to be able to be twisted to turn on the LEDs. From what I’ve read, however, the LED kits are not terribly reliable and not always worth the purchase (I’ll know soon, I have some on order).

I should also point out that each major step in the instructions (engine, arms, waist, legs, weapons) shows you in advance which sprues (also called runners or trees) and stickers will be needed. This is really handy given the volume of parts you’ll be working with.
Unlike the Real Grade Qan[t] kit, the Dynames didn’t have a pre-assembled internal frame. You build up the parts on a section at a time starting with the internals and then adding the exterior paneling. It amazed me how much detail there was in some of the inner guts of the kit — parts that would generally be obstructed from view. Even the tiny pilot and his compartment were pretty detailed. The chest was the first piece assembled that included a clear “gem” underneath which you applied a foil sticker. This gave the gem a neat reflective quality and showed off some sci-fi text. Once the chest is assembled, the GN drive can slip into the chest and be held in place by clamps.

The head unit was the next piece to assemble and surprisingly complex. Layers of plastic from different colored plastic parts gave the head an incredible amount of detail which was further highlighted by the reflective sticker used for the eyes and the sticker used for the targeting sensor on his head. In fact, the head was the first point at which I really paused to admire the figure. There’s a LOT of detail to be had here and a lot to appreciate already.

The rest of the figure assembled in a similar manner — building the inner joints and components and then adding the external paneling. The arms featured a choice of four different palms for each hand which can easily be swapped out if you needed to. The knees conceal some missiles while the panels over the hips conceal some additional weapons. All of the joints attack very firmly and give a nice bit of resistance when you try to move them. There’s plenty of flexibility in all of the joints and nothing feels even the slightest bit loose. There are multiple points of articulation in the knees and ankles to give you a large variety of options when posing — far, far more than the little High Grade model kit and more than the Flame Toys kits. There are also some swivel joints in the hips allowing an even greater range of motion for the legs.

Once the core Gundam was assembled, the next step was addin gall of the extra weapons and armor. The Dynames has a TON of weapons including a cloak-like GN Full Shield; the GN Sniper Rifle; two GN Beam Pistols which can be stored on his hips and finally the Beam Saber.

Once fully equipped and assembled, the Gundam Dynames looked amazing. Lots of color and detail out of the box, plenty of accessories to play around with and plenty of articulation for dynamic action poses. My biggest concern was the scarring left over from where parts had been removed from the sprues – especially on the darker plastic pieces where white stress marks can be much more visible. I didn’t take a whole lot of caution when I cut the parts off of the trees but in many cases I did cut further back from the part at first and then trimmed the excess carefully and the results were pretty good with a number of the nub marks being hidden. Anyone assembling a Gundam kit could easily stop right here at this point and have a nice, show-accurate model to proudly display on their shelves. Panel lining and stickers are optional and can take some time and effort but if you have the patience they can be worth it. I was definitely planning to move ahead with both.

The next step I took was to pull out the panel liners. These markers bring out the details in the plastic, making them much more visible. I chose to use gray on the white pieces and black on the colored pieces but you could just as easily use black on all of them. I used the fine point Gundam Marker pens but I know there are multiple ways to do panel lining. If you’re afraid of messing up your kits with panel lining, don’t be. For the most part, any mistakes or error scan be wiped away with a finger, cotton sab or cloth. I disassembled Dynames — removing the armor, arms, shoulder pads and legs from the kit. This made it easier for me to do the lining.
Here’s an example of the legs — one with panel lining, and one without — to highlight the difference.

For stickers, I again kept the limbs and weaponry separated. There are dozens of stickers to apply to the kit and they are all very small and can require some precision. There were a couple that I didn’t quite get perfect but for the most part, I was very happy with the results. There are several tutorials online around adding stickers and I recommend looking at them if you’re struggling. The nice thing is, the stickers are, again, entirely optional and not even shown on the character models on the show. It really comes down to personal preference if you do decide to add them.
After re-assembling the limbs and adding the weapons back on, I had what I considered to be a fantastic 1/100 scale Master Grade Gundam for my shelf. I had spent a couple of evenings building the kit and an evening doing the panel lining and stickers. It was a fun way to spend an evening while social distancing and the resulting figure was more detailed than anything you would ever get pre-assembled for the price.


I’m not on the hunt for my next Master Grade kit while also looking at potential High Grade and Real Grade kits to try. It’s been a fun and addictive process and it’s nice to get a beautiful little figure as a resuld of your work. The kits also allow for as much customization and detailing as you might want. You can chose to add or not add stickers and panel lining but you can take your kit even farther. Painting, weathering, customizing — you’re imagination is the only limit when it comes to these kits.
Having assembled three of the different classes of Gundam kits (High Grade, Real Grade and Master Grade) along with two Flame Toys kits, I’d like to share a few thoughts based on my own experiences.

While I found the Flame Toys kits to be a bit lacking, they weren’t bad kits overall and for anyone interested in Transformers they could be a good place to start. I did find the kits fell far short when compared to Bandai’s years of expertise with Gundam kits. They are also a bit pricey for what you get — likely as a result of the licensing fees. Optimus Prime was fun to assemble honestly and the results — while very loose — were still nice. Bumblebee, however, was frustrating with odd color matching issues. I wouldn’t recommend it.
The Gunpla Starter Kit Vol 2 was a fantastic place for me to have started. It’s not the most involved kit but it’s really inexpensive, fun and the end result is a nice, pose-able version of the classic Gundam. Even as a basic entry level kit it still outshines the Flame Toys kits just in terms of overall quality. If you want to try assembling a kit, the High Grade kits are likely a great starting point. They aren’t expensive, they aren’t that hard to put together and the results are still fantastic — especially newer kits. They would also likely make great kits for learning different customization techniques.
The Real Grade kit was a lot more challenging. There were a lot of parts (12 sprues worth) with many very tiny pieces to assemble. For anyone looking to add stickers there were plenty and they were minuscule. The kit I did was still a lot of fun and the result was an extremely highly detailed model that nearly rivals the Master Grade in terms of detail and probably exceeded it in terms of challenge. I don’t know if I would recommend it as a first kit, but I didn’t find anything overly difficult or frustrating — it just took patience. Still, the Real Grade kits are cheaper than their Master Grade counterparts and take up less shelf space while also packing in a lot of fun. If you’re interested in model kits, you really should try one.
The Master Grade kit was my favorite. It had the level of detail of the Real Grade kit and then a little more (as the extra size would allow) with a ton of pose-ability. The scale made it a little more relaxing to build but there was still no shortage of little pieces to be mindful of. Cost, availability and shelf space is where these kits take a hit but they can be worth it.
There are other grades and varieties of Gundams to be found of course, but those are the kits I’ve worked with and they are all fairly readily available. I know I’ll be trying a few more myself.